Chapter 6. Deploy Django App

Hosting Service Initial Settings (1) – AWS Lightsail setup

Hosting Service Initial Settings (1) – AWS Lightsail setup
Tag:

Summary of the initial settings

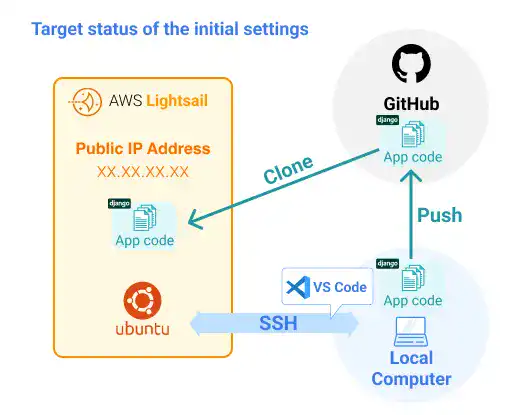
The illustration below shows the initial settings' target status to place the app code on the webserver. If you are managing this step for the first time, it may take longer than you expected, as this step requires a lot of configurations for different platforms. Some processes are not mandatory, but they give you operational efficiency later on.
Hosting-Service-Initial-Settings-1--AWS-Lightsail-setup

We split this step into three sections. This lesson covers the first section.

  1. AWS Lightsail setup (this section)
    • Prepare AWS Lightsail and create an Ubuntu (20.04 LTS) instance
    • Obtain a static IP address and attach it to the instance
  2. SSH remote connection between the local computer and the Ubuntu instance
    • Establish an SSH connection between the local computer and the instance
    • Enable the remote access using VS Code
  3. Clone the project directory to the instance using GitHub
    • Push the project directory from the local computer to the GitHub repository
    • Establish a remote connection between the GitHub repository and the Ubuntu instance (register a developer key)
    • Clone the project directory to the Ubuntu instance

Prepare AWS Lightsail and create an Ubuntu (20.04 LTS) instance

We have detailed explanations on how to set up AWS Lightsail in our 'Linux OS Introduction' course. Click the button below to open the related page in a different tab.

Linux OS Introduction 'Setting Up Linux Environment on AWS'

Obtain a static IP address and attach it to the instance

Once you create a Ubuntu instance, you need to obtain a static IP address and attach the address to the instance.

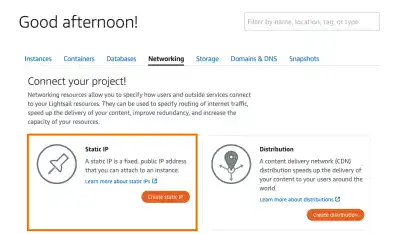
Go to the Networking section in your AWS Lightsail console to obtain a static IP address. Click on the Create static IP button.
Hosting-Service-Initial-Settings-1--AWS-Lightsail-setup

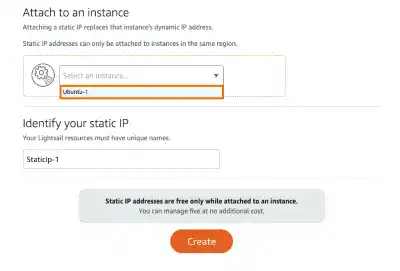
Select your instance to attach the static IP and click the Create button.
Hosting-Service-Initial-Settings-1--AWS-Lightsail-setup

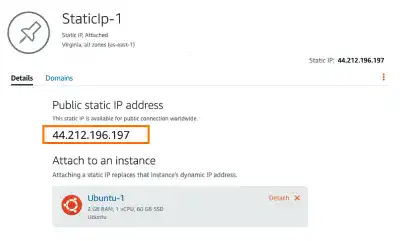
You can confirm your public IP address attached to the Ubuntu OS instance.
Hosting-Service-Initial-Settings-1--AWS-Lightsail-setup

Using a static IP address, you can continue to use the same IP address even when you delete the current instance. When you create a new instance, you just need to re-attach the static IP address to the new instance.

This static public IP address will be used for your SSH connection settings in the next section.

If you are not using a static IP address, the IP address will change every time you switch to a new instance. Using a static IP address gives you better operational efficiency as you don't need to re-set the SSH configuration.

Tag: