Chapter 5. User Management

Django Allauth (6) – Social Login with Google

Django Allauth (6) – Social Login with Google
Tag:

This lesson will explain how to set up a social login with Google. The approach can change depending on Google's policy. This approach is valid as of April 2023.

1. Register a new OAuth app in the GCP(Google Cloud Platform) console

Go to the GCP (Google Cloud Platform) . Click on the Console button on the top bar.

Django-Allauth-6--Social-Login-with-Google

Click on Select a project. And press the NEW PROJECT button.

Django-Allauth-6--Social-Login-with-Google

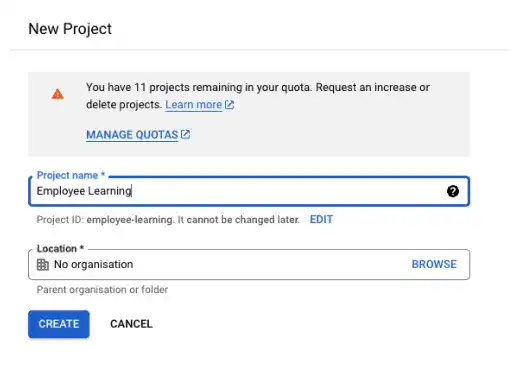
Add a project name (e.g., Employee Learning) and press the CREATE button.
Django-Allauth-6--Social-Login-with-Google

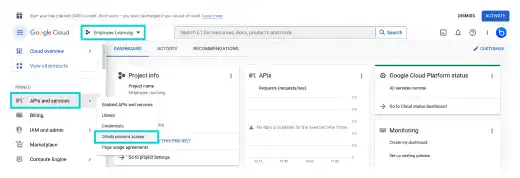
In the created project (Employee Learning), select API and services. Click on OAuth consent screen.
Django-Allauth-6--Social-Login-with-Google

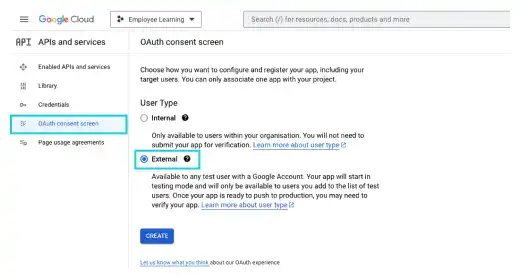
On the OAuth consent screen, select External and press the CREATE button.
Django-Allauth-6--Social-Login-with-Google

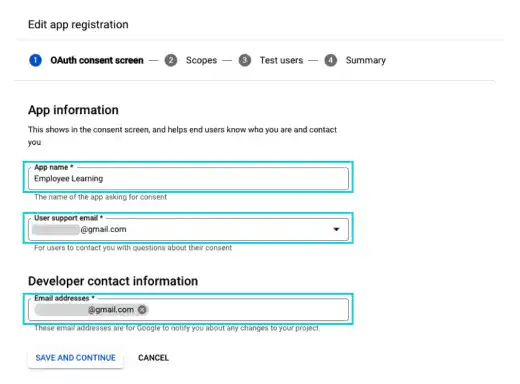
Add App name, User support email, and Developer contact information at the bottom.
Django-Allauth-6--Social-Login-with-Google

There is no need to add other information. Click on Save And Continue in the rest of the steps.

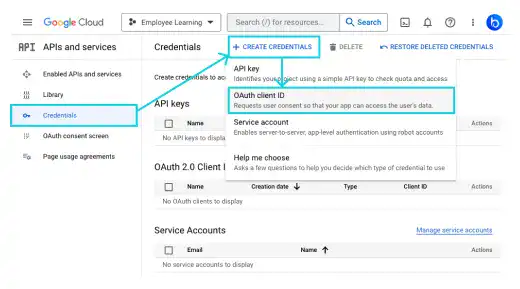
Once the OAuth consent part is done, select Credentials on the left sidebar. And click on + CREATE CREDENTIALS. Select OAuth client ID from the dropdown menu.
Django-Allauth-6--Social-Login-with-Google

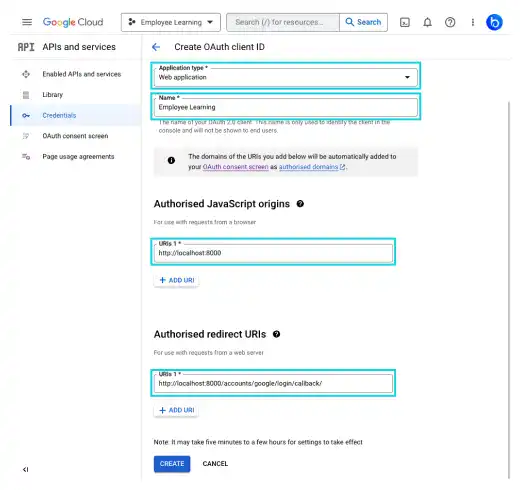
Add the following information.

  • Application Type: Web application
  • Name: Any name (e.g., Employee Learning)
  • Authorized JavaScript origins: http://localhost:8000
  • Authorized redirect URIs: http://localhost:8000/accounts/google/login/callback/

Carefully type, especially for Authorized JavaScript origins and Authorized redirect URIs.

  • Authorized JavaScript origins is the Homepage URL in GitHub.
  • Authorized redirect URIs is Authorization callback URL in GitHub.

Django-Allauth-6--Social-Login-with-Google

Often, error come from this setting. If you are using 127.0.0.1 for the runserver command, use 127.0.0.1 here as well. Another point you need to be careful about is the accounts part. Don't forget to put s at the end.
Django-Allauth-6--Social-Login-with-Google

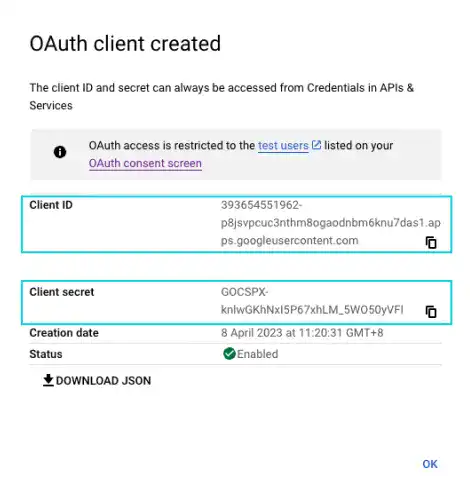
Once you have filled in all the required data, click on CREATE. You can see a pop-up with the Client ID and Client secret and save them somewhere in a safe place. We'll use them later.
Django-Allauth-6--Social-Login-with-Google

2. Edit settings.py

To add the Google social login feature, you need to edit settings.py.

  • Add allauth google app in the INSTALLED_APPS section
  • Add SCOPE and other settings under SOCIALACCOUNT_PROVIDERS
config/settings.py
INSTALLED_APPS = [
      :
    'allauth.socialaccount.providers.github',
    'allauth.socialaccount.providers.google',
]

###Social Login###
SOCIALACCOUNT_PROVIDERS = {
    'github': {
        'SCOPE': [
            'user',
            'repo',
            'read:org',
        ],
    },
    'google': {
        'SCOPE': [
            'profile',
            'email',
        ],
        'AUTH_PARAMS': {
            'access_type': 'online',
        },
        'OAUTH_PKCE_ENABLED': True,
    },
}

Check the allauth official document for details.

3. Register in Django Admin

As the last step, you need to add your domain on the Site page and Google social login settings on the Social applications page in the Django admin site.

Update the domain information on the Site page

You can skip this step if you have done this in the previous GitHub section.
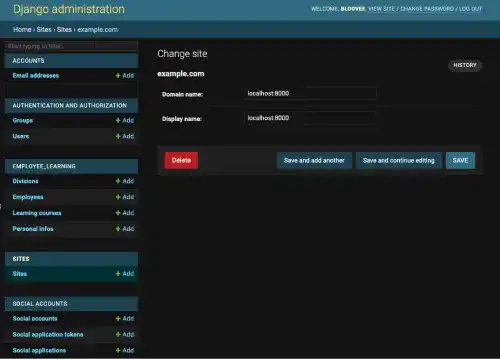
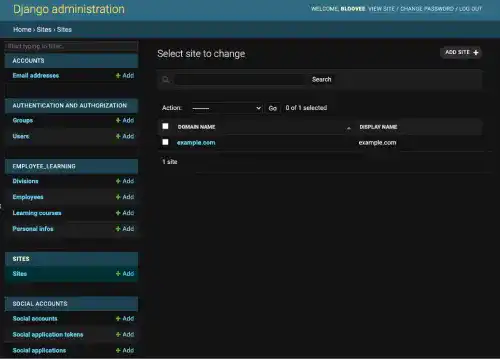
Click on the Site link on the left sidebar. As a default, example.com is registered on the Site page.
Django-Allauth-6--Social-Login-with-Google

Change it to localhost:8000.

Django-Allauth-6--Social-Login-with-Google

Add Google social login settings on the Social applications page

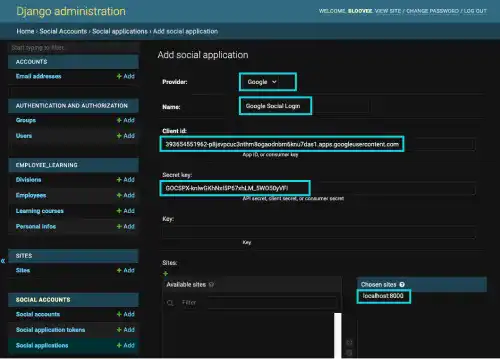
Click on the +Add button beside the Social applications link on the left sidebar.
Add the following settings:

  • Provider: GitHub
  • Name: Any name
  • Client ID: Client ID obtained from GitHub website
  • Secret Key: Client secret obtained from GitHub website
  • Sites: localhost:8000

Once it's done, save the record.
Django-Allauth-6--Social-Login-with-Google

Once it's done, save the record.

4. Check the results

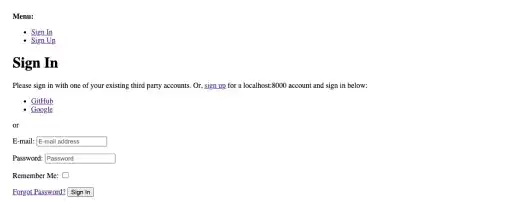
Go to the Sign In (Login) page (not the Sign Up page!) to check the results.

You can see the link named Google.
Django-Allauth-6--Social-Login-with-Google

Click on the link. And then click on the continue button.

Django-Allauth-6--Social-Login-with-Google

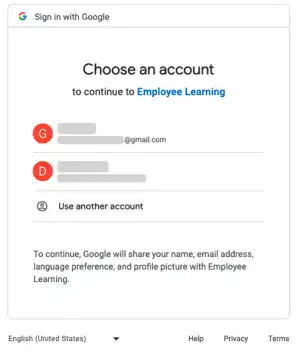
You'll be redirected to the Google's site. Select an account you want to use for the social login.
Django-Allauth-6--Social-Login-with-Google

Once you select an account, you'll jump to the landing page (You are successfully logged in to the app).
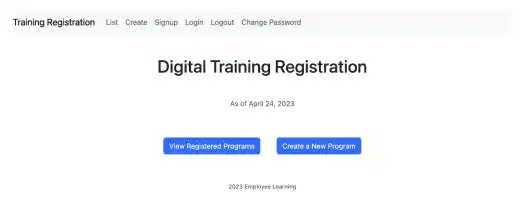
Django-Allauth-6--Social-Login-with-Google

Unlike with the GitHub social login setting, you don't need to verify your email again.

Tag: