Chapter 11. CSS: Styling Text and Images

Web Font and Google Font

Web Font and Google Font
Tag:

As explained in the previous section, fonts are usually device-dependent. If users don't have the font which the website specified, a browser renders an alternative font. Web fonts are used as a solution to avoid inconsistencies by providing font data from the server side.

Google Font

Google Font is a free web font service. You can access the website from here Google Font .

There are two options to use Google Font.

  • Use API: Copy the link code on the Google Font site, and paste the code into the <link> tag of HTML files.
  • Download fonts: Download fonts from the Google Font site, save the fonts in your project directory, and specify the font file path in CSS.

The first option is more common and easy to implement. In this course, we'll explain the first option.

Google Font Settings

Using API, you can quickly implement web fonts.

1. Go to the Google Font website.
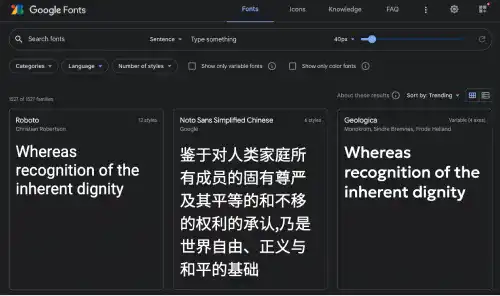
Web-Font-and-Google-Font

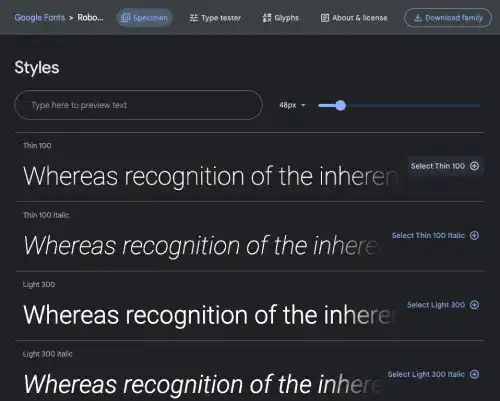
2. Select a font family you want to use.

For example, select Roboto. You can see fonts with different weights (thickness) and styles.
Web-Font-and-Google-Font

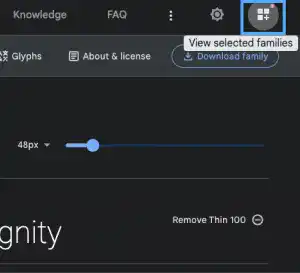
3. Select the fonts you want to use and press the top right button to view selected fonts.
Web-Font-and-Google-Font

4. Copy the <link> tags at the bottom right.
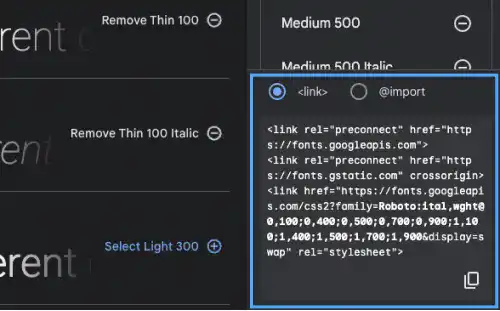
Web-Font-and-Google-Font

5. Add the web font link to the HTML document.

Open the HTML file of your project with a text editor (e.g., VS Code), and paste the code into the head section.

<head>
   :
  <link rel="preconnect" href="https://fonts.googleapis.com">
  <link rel="preconnect" href="https://fonts.gstatic.com" crossorigin>
  <link href="https://fonts.googleapis.com/css2?family=Roboto:xxxxxxxxxx=swap" rel="stylesheet">
   :
</head>

6. Add CSS to apply the web font to your website.

Add the CSS code like shown below. The selector part is usually body.

selector{
  font-family: 'Roboto', sans-serif;
}

Practice

Objective:
Set up Google Font

1. Obtain a web font link from the Google Font website

  • Follow the instructions in the main section
  • For this practice, get all available Roboto fonts. Select all weights and styles (at the time we are creating this practice instruction, fonts except 200, 600, and 800 weights are available for both normal and italic fonts).
  • Copy the <link> tags generated at the bottom right.

2. Paste the code in the <head> section of the HTML file

Open the chapter11.html file with VS Code, and paste the copied code into the <head> section. Also, add comments for code readability.

chapter11.html
<!DOCTYPE html>
<html lang="en">
<head>
  <meta charset="UTF-8">
  <meta name="viewport" content="width=device-width, initial-scale=1.0">
  <!--Google Font-->
  <link rel="preconnect" href="https://fonts.googleapis.com">
  <link rel="preconnect" href="https://fonts.gstatic.com" crossorigin>
  <link href="https://fonts.googleapis.com/css2?family=Roboto:ital,wght@0,100;0,300;0,400;0,500;0,700;0,900;1,100;1,300;1,400;1,500;1,700;1,900&display=swap" rel="stylesheet">
  <!--Custom CSS-->
  <link rel="stylesheet" href="css/practice.css">
  <title>11. CSS: Styling Text and Images</title>
</head>

3. Update the CSS file

Open the practice.css file and add the font-family property to the <body> element at the beginning of the CSS file.

practice.css
body{
  background-color:white;
  color: #196060;
  font-family: roboto, sans-serif;
}

4. Check the result with a browser

  • Open chapter11.html with a browser.
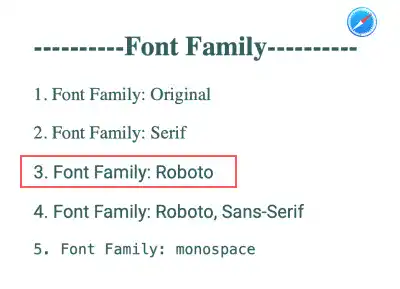
  • These are the examples rendered in Chrome and Safari. In the previous practice, the results of the 3rd case were different as Safari doesn't have Roboto font as a default setting; however, this time you can see that Roboto font is properly displayed even in Safari.

With Chrome
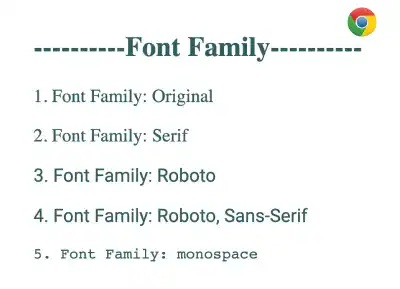
Web-Font-and-Google-Font

With Safari

Web-Font-and-Google-Font

You can also check the sample result here (Demo Site link).

link demo code

Tag: