Chapter 19. Publishing Websites

GitHub Pages

GitHub Pages
Tag:

GitHub Pages is a website hosting service provided by GitHub. GitHub Pages is connected with GitHub repositories. You can publish website documents stored in a GitHub repository very easily.

Publish a website using GitHub Pages

Having basic knowledge about Git and GitHub is preferable, but even if you don't know how to use Git and GitHub, you can use GitHub Pages.

Here are the key steps to publish a website using GitHub Pages.

  1. Create a GitHub account
  2. Create a new repository
  3. Upload project files
  4. Commit the change
  5. Setup a branch for GitHub Pages
  6. Check the website in a browser

We'll explain each step in the practice section below.

Practice

Objective:
Publish a website using GitHub Pages

1. Create your GitHub account

  • Go to the GitHub website.
  • Click on the Sign up button.

GitHub-Pages

  • Register your email, password, and username.
  • Select a free plan.

2. Create a new repository

  • Click the green New button or select New Repository from the + menu.

GitHub-Pages

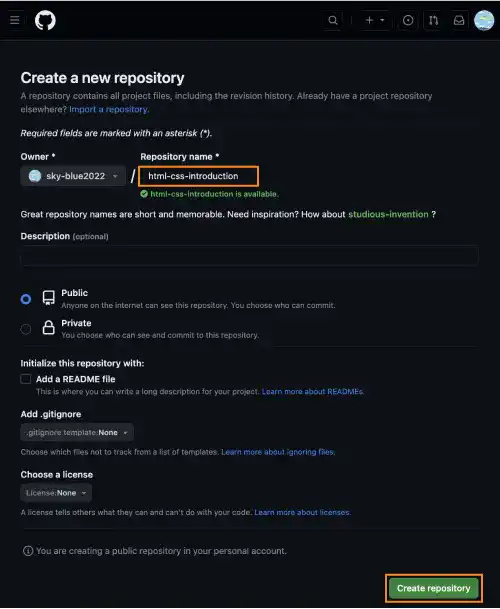
  • Type a repository name. In this practice, we set html-css-introduction.
  • Click on the Create repository button.
GitHub-Pages

3. Upload project files

  • If you know how to use Git and GitHub, you can push the project files to the repository. If you don't know how to do that, you can use the file uploader prepared by GitHub.
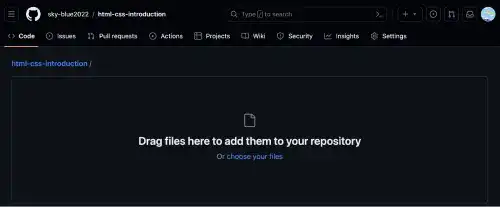
  • To upload project files using the file uploader, click uploading an existing file like shown in the image below.

GitHub-Pages

  • You'll go to the file uploader page.

GitHub-Pages

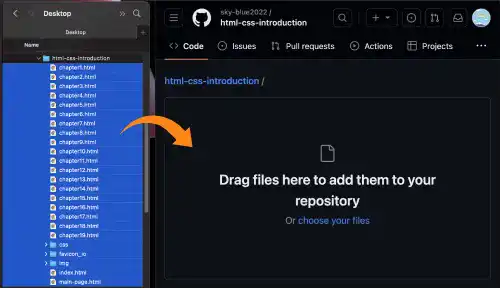
  • In the project directory, select all the project files (not the project directory itself).
  • Drag the files and drop them into the file uploader section.
GitHub-Pages

4. Commit the change

  • To save the files in the repository, you need to make a commit. Type a commit message like "Added files via upload". You can also skip typing the message. In that case, the message will auto-generated.
  • Click on the Commit changes button.

GitHub-Pages

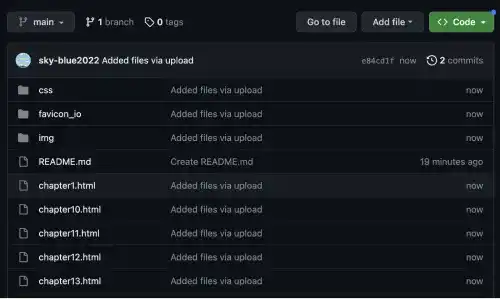
  • Now you can see that the files are successfully uploaded into the repository.
GitHub-Pages

5. Setup a branch for GitHub Pages

  • To activate GitHub Pages, you need to set up a branch.
  • As the default branch setting is none, you need to change it to the main branch.

GitHub-Pages

  • After selecting the main branch, click on the Save button.
  • It may take time in this process.

GitHub-Pages

6. Check the website in a browser

Websites hosted in GitHub Pages are available at the following URL

https://username.github.io/repository name/

For a username, use your GitHub account name. For the repository name, use html-css-introduction set in this practice.

You'll see that your website was successfully published.

GitHub-Pages

You can also check the sample result here (Demo Site link).

link demo code

IdeaGitHub Pages Account URL

If you don't want to use an additional path after username.github.io/ in the URL of your website, you need to set username.github.io as a repository name.

For example, when the username of the GitHub account is sky-blue2022, create a repository using sky-blue2022.github.io as the repository name. The website will be accessible at https://sky-blue2022.github.io/.

Updating a website using GitHub Pages

There are three ways to update a published website. It may usually take a few minutes for the website to be updated.

Option 1. Directly edit the GitHub repository

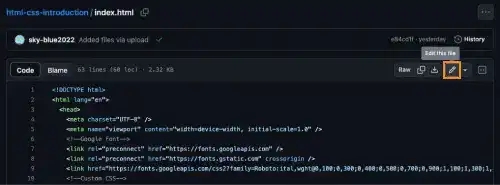
  • Open the file you want to edit in the GitHub repository. Select the edit icon to edit.
  • After editing the file, press the green Commit changes... button.
GitHub-Pages

Option 2. Re-upload the edited documents using the uploader

  • The way to upload new documents is the same as the one we already explained.
  • When you upload the file with the same name in the repository, the existing file will be replaced with the new file.

Option 3. Connect the GitHub remote repository with your local Git repository

  • This is the most common approach; however, you need to understand the basics of Git and GitHub. Check the Git & GitHub Introduction course if you want to understand how to use Git and GitHub.

IdeaEntry file for GitHub Pages

When you use GitHub Pages, you need to have an index.html file in the project directory used as the entry file. GitHub Pages will look for the index.html file when users access the URL of your website using GitHub Pages. The file name is case-sensitive. You cannot use Index.html as the entry file name.

The entry file must be placed at the top level of the repository so that GitHub Pages can properly access it.

Tag: