Template for Create and Update Page

You can use almost the same templates for the create page and update page. Those two pages should be designed to allow user data input with the form HTML tag.
In the most basic implementation, there are three key parts in the create and update page template.
- A form with the
<input>tag {{ form.as_p }}{% csrf_token %}
1. A form with an input tag
In HTML, the <form> tag is used to nest input forms. The method attribute defines which HTTP method to be used for input data transfer. For input forms, the POST method is usually used.
The <input> tag with the type="submit" attribute creates a data submission button. You can also use the <button> tag instead of the <input> tag.
2. {{ form.as_p }}
The form part is an object defined by the view. In the employee_learning app case, we set the field attributes like the one below.
fields=('title', 'level', 'employee')
Those model fields are converted into input forms through the form object.
The as_p() method is used to add the <p> tags in each form element. There are other similar methods like as_ul(), as_table(), but as_p() that are often used for the form object.
3. {% csrf_token %}
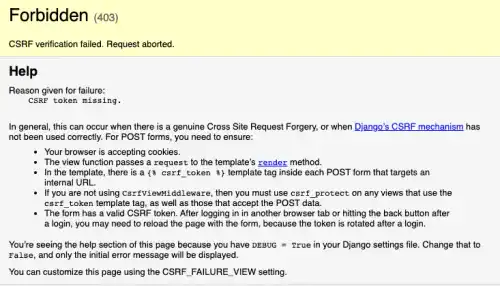
This is used to protect against Cross-Site Request Forgery (CSRF). CSRF is a type of cyberattack that forces an end user to execute unwanted actions on a web application, for example, by sending JavaScript code through the input forms. By adding {% csrf_token %}, Django generates a token to build a more secure communication when a user is sending data through the input forms.
If you don't add this tag, when a user submits their input, the user will see the Forbidden error message like the one below.

Practice
Objective:
Learn how to make create and update page templates
In this practice, we'll make templates for 'create' and 'update' pages.
1. Edit course_create.html and check the result in a browser
Open the course_create.html file, add the yellow lines below, and save the file.
<h1>CREATE Page</h1>
<form method="post"> {% csrf_token %}
  {{ form.as_p }}
  <input type="submit" value="Save">
</form>
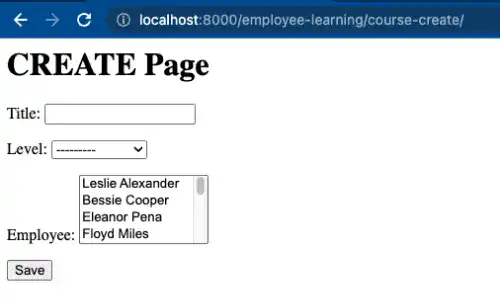
After saving the file, Go to localhost:8000/employee-learning/course-create.

2. Edit course_update.html and check the result in a browser
Open the course_update.html file, add the yellow lines below (the same code as the one for the create page), and save the file.
<h1>UPDATE Page</h1>
<form method="post"> {% csrf_token %}
  {{ form.as_p }}
  <input type="submit" value="Save">
</form>
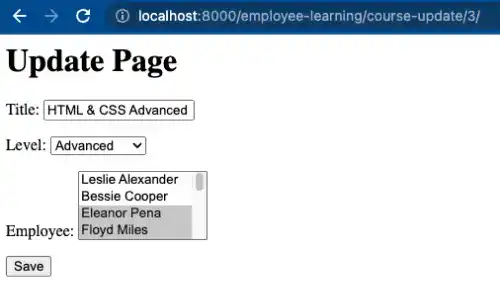
After saving the file, Go to localhost:8000/employee-learning/course-update/3/. To go to an update page, you need to specify the id number.


