Install Django

The Django installation guide is available on the Django official site.
You can install Django by simply running the pip command. Pip is Python Package Manager. The best practice for installing Django is using the requirements.txt file. As you will likely install other libraries during the Django app development process, it is better to record the library information in one place. You can add libraries to install for your app in the requirements.txt file. Here are the critical steps for Django installation.
Step 1. Create a requirements.txt file
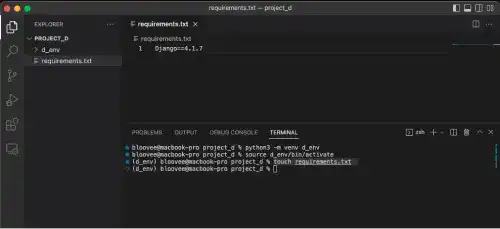
Create a text file named 'requirements.txt' directly under the project directory. Click the file icon on the left sidebar of the VS Code to create a new file.
Step 2. Add Django with the version name in the requirements.txt file
Check the latest version on the download page on the Django official site.
You can install Django without specifying a version; however, it is better to specify it to manage dependencies properly.
The example below is for installing Django version 4.1.7. Do not forget to save the file when you finish editing it.
Django==4.1.7
This is a screenshot of the VS Code for your reference.

Step 3. Update and run the pip command
To install Django, you can use the pip command. To make sure the pip command is the latest one, upgrade it by running the command below.
python -m pip install --upgrade pip
You'll see the pip version when it is successfully upgraded.
:
Successfully installed pip-23.0.1
After upgrading the pip, run the pip command. Ensure that the virtual environment is active when running the pip command. If your command line prompt starts with (virtual environment name), the virtual environment is active. Here is a command example.
pip install -r requirements.txt
You'll see that the specific version of Django is installed along with some required libraries.
:
Successfully installed Django-4.1.7 asgiref-3.6.0 sqlparse-0.4.3

