HTML Element

HTML is a markup language, which controls how a document is displayed. In HTML, content is written between the start tag and the end tag.
Tag and Element
Tag
A tag provides information to a web browser on how to display the content inside the tag. As a tag just provides instructions to a web browser, it is not displayed in browsers.
Element
A set of information including the start tag, content, and the end tag is called an element. Building a website is structuring elements like blocks (by HTML) and decorating blocks (with the use of CSS).
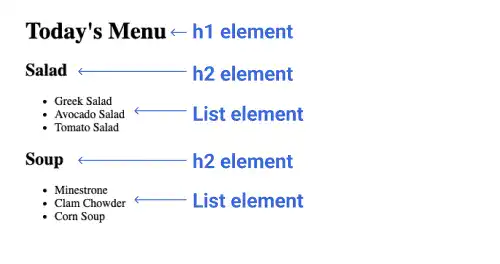
This is an example of HTML code.
HTML Example
<h1>Today's Menu</h1>
<h2>Salad</h2>
<ul>
  <li>Greek Salad</li>
  <li>Avocado Salad</li>
  <li>Tomato Salad</li>
</ul>
<h2>Soup</h2>
<ul>
  <li>Minestrone</li>
  <li>Clam Chowder</li>
  <li>Corn Soup</li>
</ul>
The HTML above will be displayed in a browser as shown below.
Web Browser

Tags
HTML provides several tags. The following lists are types of HTML tags. For now, you don't need to memorize all of them. We'll explain these tags in more detail later.
Document Type and Metadata:
<html>, <head>, <title>, <link>, <meta>, <style>
These tags are written in the front section of an HTML document to give general instructions to browsers, such as CSS file path, to add style to the page. Content under these tags is mostly not displayed in the browser.
Sections (Layout Semantics):
<body>, <header>, <nav>, <main>, <article>, <section>, <aside>, <footer>
These tags are used to group contents for layout. Actual design instructions are largely done by CSS; however, these tags provide a web browser with types of content information, e.g., organizing the page content based on its importance and type of information.
Text-level Semantics:
<a>, <em>, <strong>, <small>, <abbr>, <code>
These tags can add meanings to a specific part of text content. For example, <a> is used to create a link to another website page. <strong> is used to highlight a specific part of text content. To apply a tag to a part of text content, you can insert these elements even within a paragraph.
Grouping Content:
<p>, <hr>, <br>, <ol>, <ul>, <li>, <pre>
These tags are used to group content. For example, <p> is used for a paragraph. <hr> is used to separate content by drawing a horizontal line. <br> is used to add line breaks. <ol>, <ul> and <li> are used to create lists.
Embedded Content:
<img>, <video>, <iframe>
You can embed media content by using these tags, such as images and videos. You can also embed other website content by using iframe.
Tables:
<table>, <tr>, <td>, <th>
These tags allow you to create tables on a web page. There are particular rules used to structure a table, which will be explained later.
Forms:
<form>, <input>, <textarea>, <select>, <label>, <button>
For some website pages, you may want to create user input forms. These tags are used to create various user input forms.
div and span
<div> and <span> are often used to customize website design. As <div> and <span> don't have semantics (meanings of elements), they can be used in various situations.
 Void Elements
There are elements that don't have an end tag. Those elements are called void elements. For example, <img>, <link>, <meta>, <br> and <hr> are void elements.Void elements cannot have content but they can have attributes. We'll explain attributes in the next topic.
Practice
Objective:
Understand how a web browser renders an HTML file
1. Create a new HTML file for this chapter
Open the html-css-introduction directory, which was created in the previous chapter, with Visual Studio Code (VS Code). There are several ways to open a directory or file with VS Code.
- Drag & drop the directory onto VS Code icon on your desktop
- Short-cut in the VS Code application. ⌘ + O for Mac or Ctrl + O for windows
Create a new HTML file chapter3.html in the html-css-introduction directory.
2. Type new HTML code
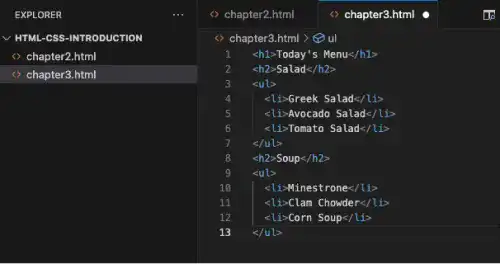
In the chapter3.html file, type or copy and paste the HTML code in the main section as shown below.
<h1>Today's Menu</h1>
<h2>Salad</h2>
<ul>
  <li>Greek Salad</li>
  <li>Avocado Salad</li>
  <li>Tomato Salad</li>
</ul>
<h2>Soup</h2>
<ul>
  <li>Minestrone</li>
  <li>Clam Chowder</li>
  <li>Corn Soup</li>
</ul>
This is what it looks like in VS Code.

After editing the file, make sure that you save it (⌘ + S for Mac, Ctrl + S for Windows).
3. Check the result with a browser
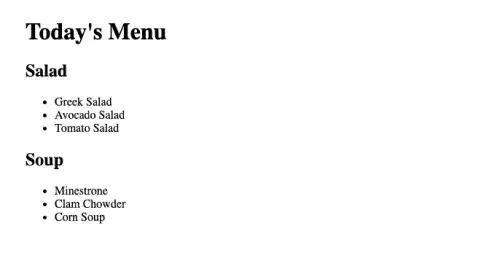
Open the file with a web browser from Finder (usually, upon the user double clicking the file, a registered web browser opens the file). You can see that the web browser renders the content properly as shown below.


