Django Templates with Bootstrap

Bootstrap is one of the most popular front-end toolkits. It provides pre-defined CSS and JavaScript code so that you can quickly implement well-designed web pages.
Bootstrap Quick Start
The following are the key steps to implement the basic Bootstrap template.
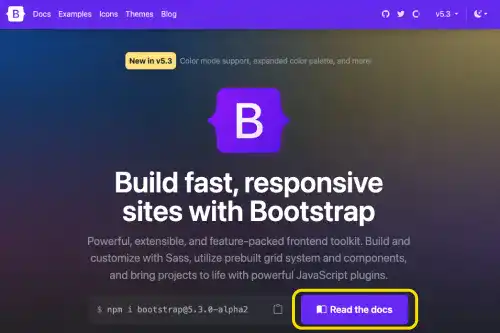
1. Go to the bootstrap website (https://getbootstrap.com/) and click on Read the docs button
2. Get code for CDN
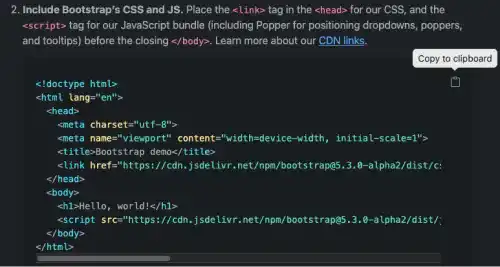
Find a CDN version that is easier to implement. Click on the copy button to get the code.
3. Paste the code into the base.html file and make some adjustments
Paste the code into the base.html file and adjust the code like shown below. The yellow lines are from Bootstrap. Keep the body contents from the original base.html file and update the website tile to Employee Learning.
<!doctype html>
<html lang="en">
<head>
  <meta charset="utf-8">
  <meta name="viewport" content="width=device-width, initial-scale=1">
  <title>Employee Learning</title>
  <link href="https://cdn.jsdelivr.net/npm/bootstrap@5.3.0-alpha2/....>
</head>
<body>

  <a href="{% url 'course_list'%}">List</a>
  <a href="{% url 'course_create'%}">Create</a>

  {% block body %}
  <p>Insert body contents here</p>
  {% endblock %}

  <h6>2023 Employee Learning</h6>

  <script src="https://cdn.jsdelivr.net/npm/bootstrap@5.3.0-alpha2/.....></script>
</body>
</html>
4. Check the results
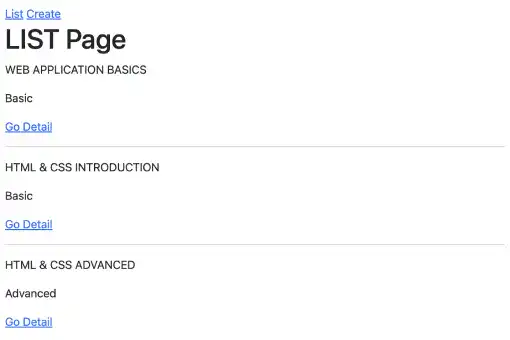
Go to the list page. You can see that the style has been slightly adjusted already.
Add Navbar (Navigation Bar)
Next, add a navigation bar style to the links on the List page and Create page using the Navbar component from Bootstrap.
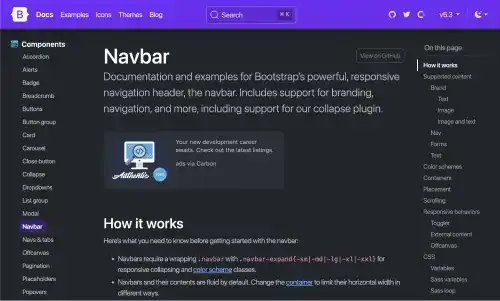
1. Go to the Navbar section under Components
Check the left sidebar and find the Components section. Under the Components section, you can find the Navbar component.
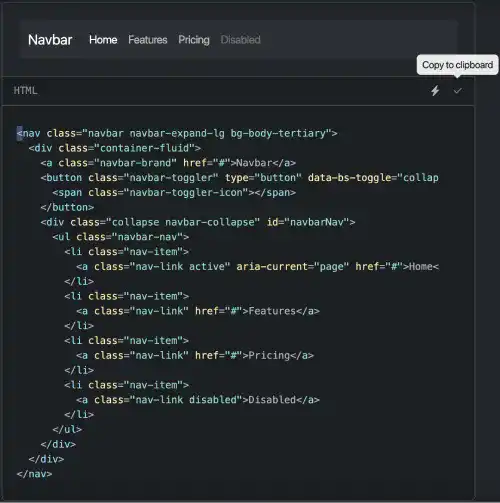
2. Copy the code for one of the Navbar components
There are several sets of code with different sub-components (e.g., dropdown or search bar). You can use the relevant ones for your app. This section will use a simple design without a dropdown or search bar.
3. Paste the code into the base.html file and make some adjustments
Paste the code into the base.html file (after the <body> tag). Adjust the code like shown below. The white code is from the original code of base.html, and the yellow code is from Bootstrap. Replace the href and the text part with the ones from the original base.html file. Also, add the brand name of this web app "Training Registration".
<body>

<nav class="navbar navbar-expand-lg bg-body-tertiary">
  <div class="container-fluid">
    <a class="navbar-brand" href="#">Training Registration</a>
    <button class="navbar-toggler" type="button" ...>
      <span class="navbar-toggler-icon"></span>
    </button>
    <div class="collapse navbar-collapse" id="navbarNav">
      <ul class="navbar-nav">
        <li class="nav-item">
          <a class="nav-link" href="{% url 'course_list'%}">List</a>
        </li>
        <li class="nav-item">
          <a class="nav-link" href="{% url 'course_create'%}">Create</a>
        </li>
      </ul>
    </div>
  </div>
</nav>

{% block body %}
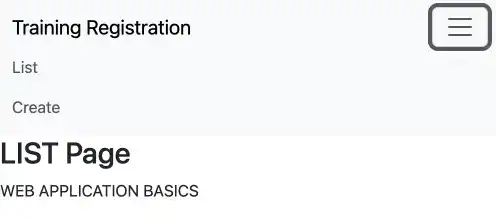
4. Check the results
Go to the list page. You can see that the navigation bar style has already been adjusted.

Also, shrink the browser window size horizontally. As Bootstrap applies the responsive design concept, you can see that the navbar menu items are collapsed under the hamburger menu.
Style buttons
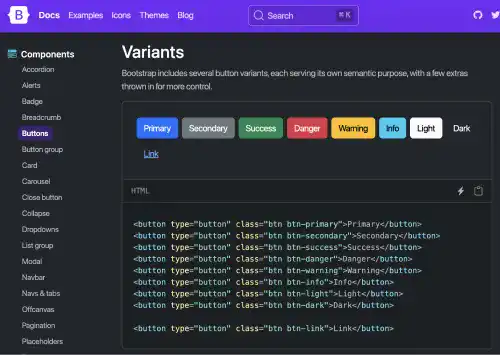
Bootstrap also provides quick styling code for buttons. You can choose a color of a button by the color theme name such as primary or secondary.

1. Find code for Bootstrap Buttons
Code for buttons is available under the Button section under Components on the left sidebar.
2. Pick a color theme for each button
Before adjusting code, it's better to come up with a design principle first. The following is the guidance for color theme selections.
List page
- "Go Detail" button:
primary
Detail page
- "Update" button:
warning - "Delete" button:
danger
Create page
- "Save" button:
primary
Delete page
- "Confirm" button:
danger
3. Copy the class code and paste into the tag to style
At this time, you don't need to copy the entire code. Just copy only the class. For example, class="btn btn-primary" for the primary color buttons.
Copy the class code and paste it into the relevant tags. For example, to adjust the Save button on the Create page, add the class with the yellow line below.
<input type="submit" value="Save" class="btn btn-primary">
Do the same for all buttons based on the design principle.
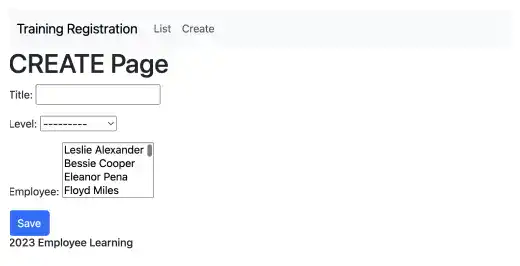
4. Check the results
Go to the Create page. You can see that the button is already nicely styled.
Style the List page with a Card and Flex box
On the list page, there are multiple objects. Using Bootstrap, you can quickly make a card-style layout.
1. Find code for Bootstrap Cards
Code for Cards is available in the Cards section under Components on the left sidebar.
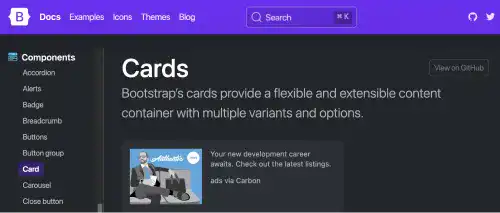
Select one of the card styles and copy the code. In this practice, choose the basic one but delete the image like shown below.
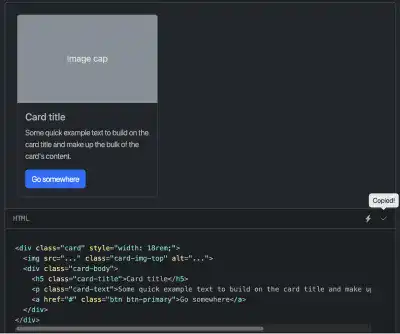
2. Paste the code into the course_list.html file and make some adjustments
Paste the code into the list.html file (after the {% for %} tag). Adjust the code like shown below.
{% for course in object_list %}

<div class="card" style="width: 18rem;">
  <div class="card-body">
    <h5 class="card-title">{{ course.title|upper }}</h5>
    <p class="card-text">{{ course.get_level_display }}</p>
    <a href="{% url 'course_detail' course.pk%}" class="btn btn-primary">Go Detail</a>
  </div>
</div>

{% endfor %}
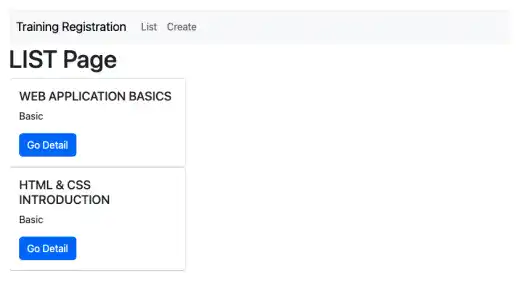
The white code is from the original code of base.html, and the yellow code is from Bootstrap. Basically, adjust the title and text. As we have already styled the button, keep the code for the button as it is.
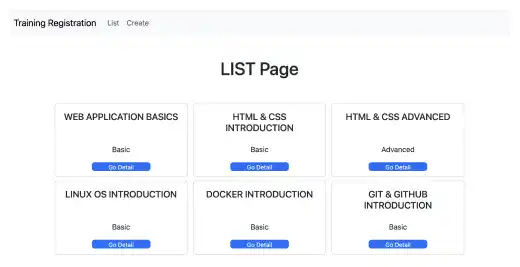
At this stage, the UI is not really well-design yet.
3. Adjust the layout and sizes
Usually, adjusting the layout and sizes requires meticulous work. Bootstrap utilities are helpful tools for speeding up layout and size adjustments using short class names.
The code below is an example of layout and size adjustments. The yellow lines add class or style attributes.
{% block body %}

<div class="container text-center">

<h1 class="text-center m-5">LIST Page</h1>

{% for course in object_list %}
<div class="card m-1 d-inline-flex" style="width: 18rem; height:10rem;">
<div class="card-body">
<h5 class="card-title h-50">{{ course.title|upper }}</h5>
<p class="card-text">{{ course.get_level_display }}</p>
<a href="{% url 'course_detail' course.pk%}" class="btn btn-primary p-0 d-block w-50 mx-auto" style="height:1.2rem; font-size:0.8rem">Go Detail</a>
</div>
</div>
{% endfor %}

</div>

{% endblock %}
Here are some explanations of Bootstrap utilities.
text-center: Text utility to move content or nested elements to the center horizontallym-#: Spacing utility to adjust margin. You can specify numbers between 0 and 5.d-inline-flex: Display or Flex utility to change the element to flex inline box.h-#: Sizing utility to adjust the height of the element relative to the parent element. 50 means 50% of the parent element's height.p-#: Spacing utility to adjust padding. You can specify numbers between 0 and 5. 0 means zero padding.d-block: Display utility to change the element to a block element.w-#: Sizing utility to adjust the width of the element relative to the parent element. 50 means 50% of the parent element's width.mx-auto: Spacing utility to horizontally center fixed-width block-level content
We are also using the container class to wrap all elements, which sets a max-width at each responsive breakpoint and allows appropriate margins on the right and left edges.
Now, you can see that the layout and sizes are nicely set.
Style the Detail and Delete page
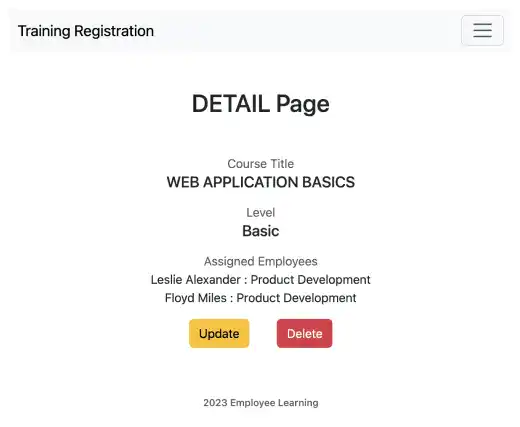
In this part, we will style the detail page using Bootstrap utilities. The yellow parts in the code below are the updated parts. The text and spacing utilities help you quickly adjust positions and sizes.
{% block body %}

<div class="container text-center">

  <h1 class="text-center m-5"> DETAIL Page </h1>

  <p class="text-muted mb-0">Course Title</p>
  <h5> {{ object.title|upper }} </h5>

  <p class="text-muted mt-3 mb-0">Level</p>
  <h5>{{ object.get_level_display }}</h5>

  <p class="text-muted mt-3 mb-0">Assigned Employees</p>
  {% for emp in object.employee.all %}
    <p class="mb-0">{{ emp.name }} : {{ emp.division }}</p>
  {% endfor %}

  <a href="{% url 'course_update' object.pk%}" class="btn btn-warning m-3">Update</a>
  <a href="{% url 'course_delete' object.pk%}" class="btn btn-danger m-3">Delete</a>

</div>

{% endblock %}
Also, update the footer in the base.html file with the yellow code below.
{% endblock %}

<h6 class="text-muted text-center mt-5" style="font-size:0.8rem">2023 Employee Learning</h6>
Now, you can see a better Detail page design.
Next, update the Delete page with the yellow code below.
{% block body %}

<div class="container text-center">

  <h1 class="text-center m-5"> DELETE Page </h1>

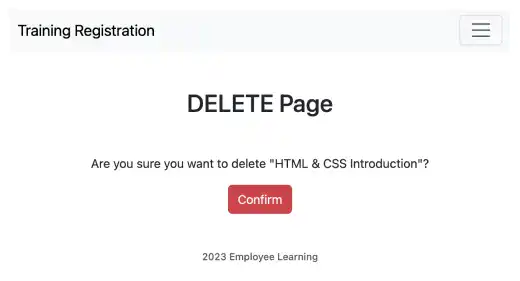
  <form method="post">{% csrf_token %}
    <p>Are you sure you want to delete "{{ object }}"?</p>
    <input type="submit" value="Confirm" class="btn btn-danger">
  </form>

</div>
{% endblock %}
