Create Lists

In this section, we'll explain how to create lists. In HTML, there are two types of lists – unordered lists and ordered lists. An unordered list is a list with bullets without any particular order. An ordered list is a list with numbers.
<ul>, <ol> and <li>
There are three key tags used in HTML to structure lists.
<ul>
Called unordered list tag. Used to group list items with bullets.
<ol>
Called ordered list tag. Used to group list items with numbers.
<li>
Called list tag. Used to list up items nested under the <ul> or <ol> tag.
Unordered List
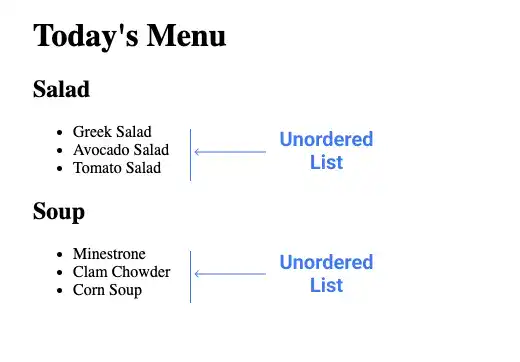
This is an example of an unordered list, which we have already shown in Chapter 3.
HTML Example 1 – unordered list (ul)
<h2>Salad</h2>
<ul>
  <li>Greek Salad</li>
  <li>Avocado Salad</li>
  <li>Tomato Salad</li>
</ul>
<h2>Soup</h2>
<ul>
  <li>Minestrone</li>
  <li>Clam Chowder</li>
  <li>Corn Soup</li>
</ul>
The HTML code above is displayed in the browser as shown below.
Web Browser

The type attribute
You can change the marker type of list items with this attribute. When you don't want to show the marker, you can use type="none". When you want to change the marker to a square shape, use type="square".
Here are the examples.
HTML Example 2 – ul with type="none"
<ul type="none">
  <li>Greek Salad</li>
  <li>Avocado Salad</li>
  <li>Tomato Salad</li>
</ul>
The HTML code above is displayed in the browser as shown below.
Web Browser

HTML Example 3 – ul with type="square"
<ul type="square">
  <li>Minestrone</li>
  <li>Clam Chowder</li>
  <li>Corn Soup</li>
</ul>
The HTML code above is displayed in the browser as shown below.
Web Browser

Ordered List
For ordered list, there are two frequently used attributes – start and type.
The start attribute
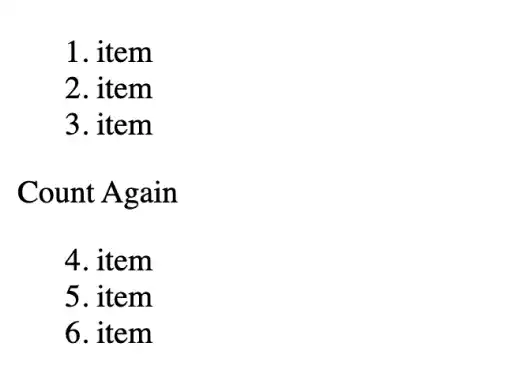
You can change the start number of the first list item with this attribute. For example, if you want to start from 4 instead of 1, you can use this attribute.
HTML Example 4 – ol with the start attribute
<ol>
  <li>item</li>
  <li>item</li>
  <li>item</li>
</ol>

<p>Count Again</p>

<ol start="4">
  <li>item</li>
  <li>item</li>
  <li>item</li>
</ol>
The HTML code above is displayed in the browser as shown below.
Web Browser

The type attribute
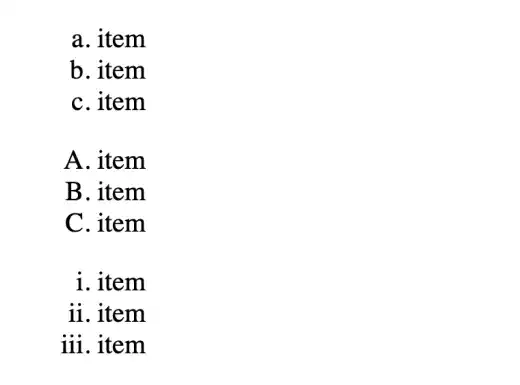
You can change the marker type of list items with this attribute. For example:
type="a": a, b, c, d, e, ...type="A": A, B, C, D, E,...type="i": i, ii, iii, iv, v, ...
HTML Example 5 – ol with the type attribute
<ol type="a">
  <li>item</li>
  <li>item</li>
  <li>item</li>
</ol>
<ol type="A">
  <li>item</li>
  <li>item</li>
  <li>item</li>
</ol>
<ol type="i">
  <li>item</li>
  <li>item</li>
  <li>item</li>
</ol>
The HTML code above is displayed in the browser as shown below.
Web Browser

Nested List
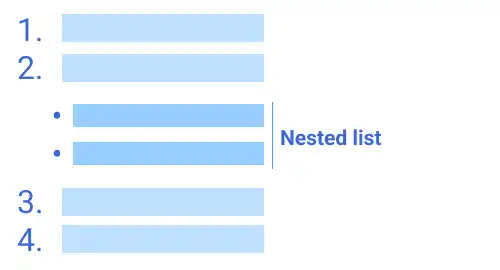
Nesting a list means placing a list inside of another list like in the illustration below.

What you need to do for nesting a list is place the <ul> or <ol> element within another <ul> or <ol> element as shown below.
<ol>
  <li>item</li>
  <li>item</li>
  <ul>
    <li>item</li>
    <li>item</li>
  </ul>
  <li>item</li>
  <li>item</li>
</ol>
Practice
Objective:
Create customized lists in HTML
1. Create a new HTML file for this chapter
- Using VS Code, create a new file chapter5.html under the html-css-introduction directory.
- Type
!and hit the tab or enter the key to create the HTML template. - Change the
<title>section to 5. HTML: Create Lists and Tables.
2. Create unordered lists with different type attributes
In the <body> section, type (copy & paste) the following code. And save the file (⌘ + S for Mac, Ctrl + S for Windows).
<h1>Chapter 5. HTML: Create Lists and Tables</h1>
<h2>Lists</h2>

<h3>1. Unordered Lists</h3>

<ul type="none">
  <li>Greek Salad</li>
  <li>Avocado Salad</li>
  <li>Tomato Salad</li>
</ul>

<ul type="square">
  <li>Minestrone</li>
  <li>Clam Chowder</li>
  <li>Corn Soup</li>
</ul>

<h3>2. Ordered Lists: Count Again</h3>
<ol>
  <li>item</li>
  <li>item</li>
  <li>item</li>
</ol>

<p>Count Again</p>

<ol start="4">
  <li>item</li>
  <li>item</li>
  <li>item</li>
</ol>

<h3>3. Ordered Lists: Various Markers</h3>
<ol type="a">
  <li>item</li>
  <li>item</li>
  <li>item</li>
</ol>
<ol type="A">
  <li>item</li>
  <li>item</li>
  <li>item</li>
</ol>
<ol type="i">
  <li>item</li>
  <li>item</li>
  <li>item</li>
</ol>

<h3>4. Nested Lists</h3>
<ol>
  <li>item</li>
  <li>item</li>
  <ul>
    <li>item</li>
    <li>item</li>
  </ul>
  <li>item</li>
  <li>item</li>
</ol>

<hr>
2. Check the result with a browser
Open the chapter5.html file with a browser. You should be able to see various types of lists in a browser, like the ones in the main section of this lesson, with titles for each list.
You can also check the sample result here (Demo Site).
 <hr> Horizontal Rule
The <hr> tag is used to add a thematic break (changing a topic) in the HTML document. Visually, it likely shows a horizontal line in the browser. The reason why we say "likely" is that these days the role of the <hr> tag is mainly providing semantics. The style of the <hr> element can differ by browser. If you want to add a horizontal line for design purposes, you should use CSS.


