SSH Remote Login with Visual Studio Code

Using a Visual Studio Code (VS Code) for SSH remote login can significantly improve your productivity. Although it is a remote environment, you can operate as if it were a local environment with high visibility of directory structure and an advanced text editor environment. Here are the steps for establishing SSH remote login with VS Code.
STEP 1. Install Remote Development Extension
Open VSC and select the extension icon from the left sidebar. Search for the Remote Development extension and click on the Install button.

Remote Development includes the following extensions:
- Remote - SSH
- Remote - SSH: Editing Configuration Files
- Remote Explorer
- WSL
- Dev Containers
STEP 2. Establish SSH Remote Connection
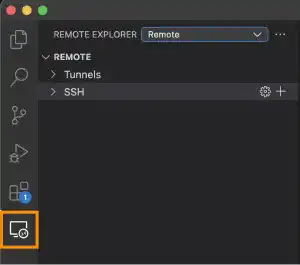
1. Select the remote login icon on the left sidebar in the Remote Explorer
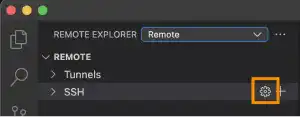
2. Click the setting icon to select the SSH config file
3. Select your SSH config file

When you select the file, you'll see the config file contents in the right window. (Please refer to the previous section about how to make the config file.)

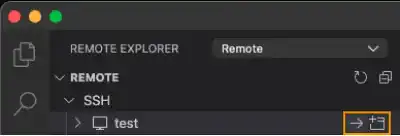
4. Click on the arrow or window icon of the SSH host name.
By clicking on the arrow icon, you can connect to the host in the same window. When you click on the window icon, a new VS Code window opens and establish the SSH connection in the new window.
Note: VS Code may also ask the platform (OS) of the host server. Select Linux if asked.
5. If you set a passphrase for the private key, you need to enter the passphrase to move forward.

6. Once VS Code is connected to the remote server, you'll see the status at the bottom left corner of the VS Code window.

7. To open directories in the remote server, select the file icon on the left and press the Open Folder button.
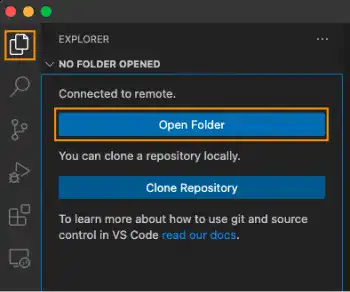
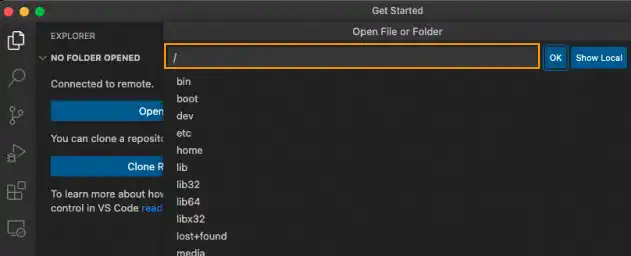
8. Select the highest directory hierarchy to display in the VS Code editor
If you want to show only your home directory (/home/ubuntu/), press the ok button. You can also change the highest directory. If you want to show the entire directory tree, type / and press the OK button.
9. If you set a passphrase for the private key, VS Code will ask for the passphrase again.

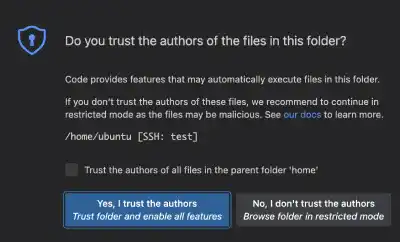
10. On the first access, VSC will ask if you can trust the folder.
Select the Yes button to connect to the folder.
STEP 3. Open a Terminal and check the SSH Remote Login Environment on VS Code
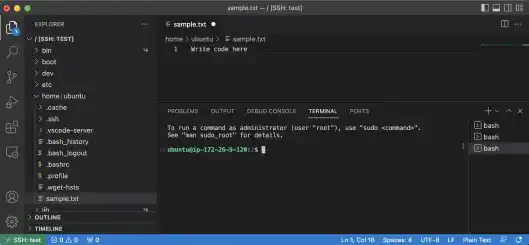
To open a Terminal in the VSC window, select Terminal on the Mac menu bar and click on New Terminal.
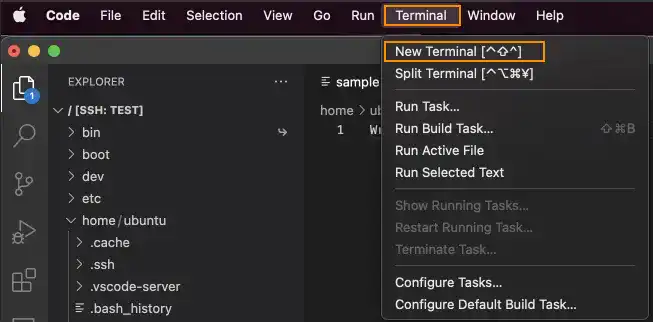
Now you can work on the remote server as if it were in the local environment.
STEP 4. Close SSH Remote Connection
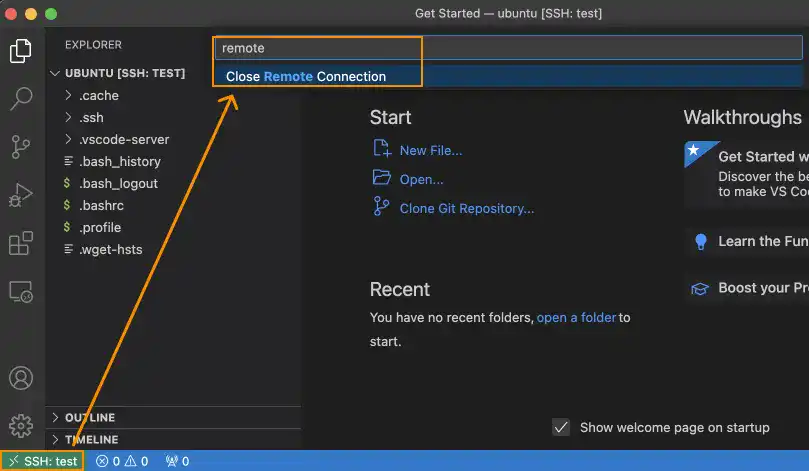
Press the bottom left SSH green icon and find the "Close Remote Connection" menu in the search bar at the top. Click the "Close Remote Connection" menu to close the connection.
 Tips: Use Terminal
If you cannot establish the SSH remote connection on VS Code the first time, try the first remote connection using the Terminal application (see the previous section). It may solve the problem. You can use VSC starting from the second connection to the remote server.
