Menu

Log in

Sign up

From beginner to master of web design, coding, infrastructure operation, business development and marketing

  • COURSES
  • HTML & CSS Introduction
  • HTML & CSS Coding with AI
  • Linux Introduction
  • Docker Basics
  • Git & GitHub Introduction
  • JavaScript Coding with AI
  • Django Introduction
  • AWS Basics
  • Figma Introduction
  • SEO Tutorial for Beginners
  • SEO with AI
  • OTHERS
  • About
  • Terms of Service
  • Privacy Policy

© 2024 D-Libro. All Rights Reserved

Git & GitHub IntroductionChapter 2. Git & GitHub Initial Settings

Key Tool Preparation (2) – Windows

Key Tool Preparation (2) – Windows

Setting Up Git & GitHub on Windows

Preparing the Git environment in Windows is slightly complex. You need to install the Git software with several initial settings. For Windows, Powershell is usually used as a command line, but Git provides a Unix-based command line called Git Bash. In this course, we assume that Windows users are using Git Bash. For the text editor, we use VS code as an example. You can open Git Bash using VS code so that you can use a command line and text editor in the same application.

The choice of a web browser is less critical. For our demonstration purposes, we use Chrome when we explain with examples.

On this page, we'll explain how to install the latest Git software onto a Windows computer and prepare VS code as a text editor with Git Bash in the VS code window.

1. Install Git

To install Git onto Windows computer, follow the steps below.

Download Git installation package

Go to this site Git download for Windows and click on "Click here to download".

Install Git and Git Bash on Windows: Step 1

The Git installation package will be downloaded onto your computer.

Open the downloaded .exe file and follow the installation instructions.

First, you'll be asked to allow the app to make changes to your device. To start the installation process, click on Yes.

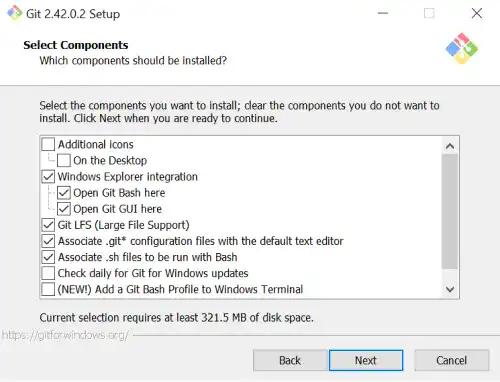
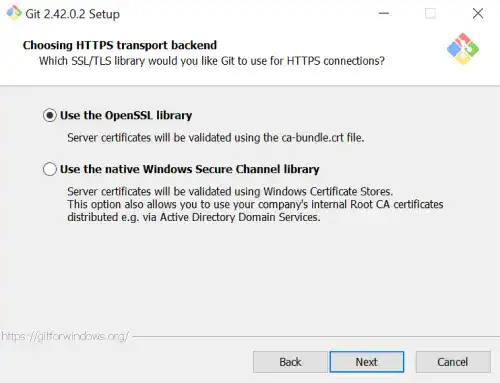
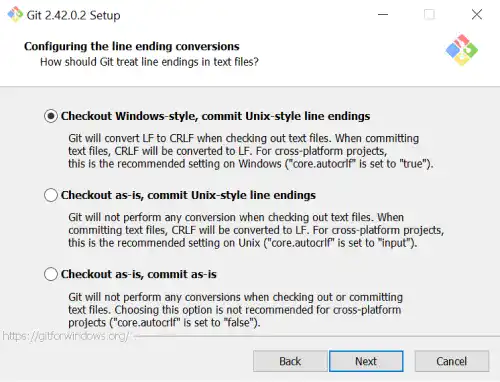
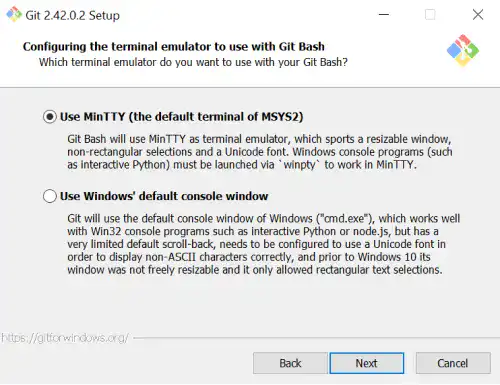
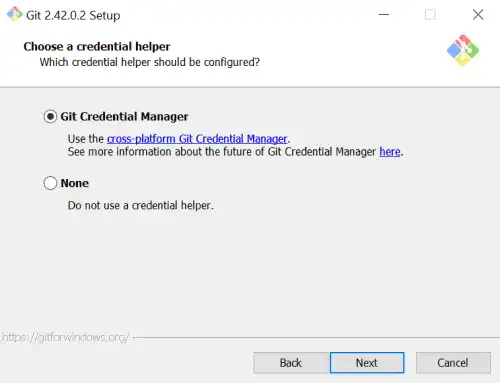
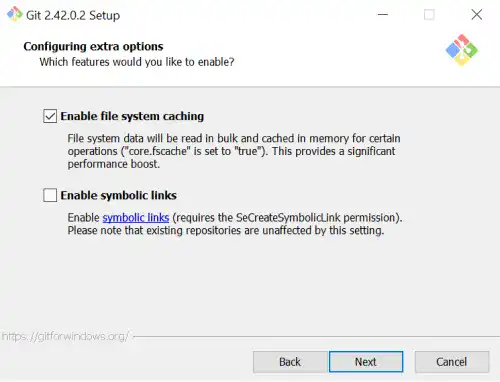
Once the installation process is initiated, you'll need to confirm many initial settings.

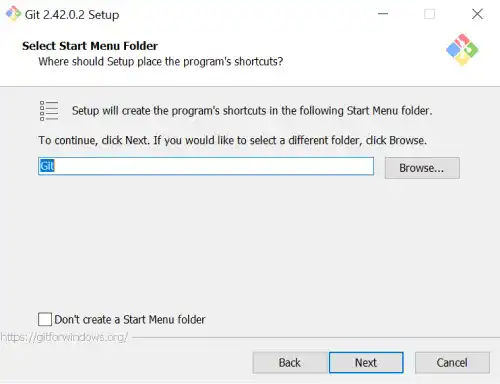
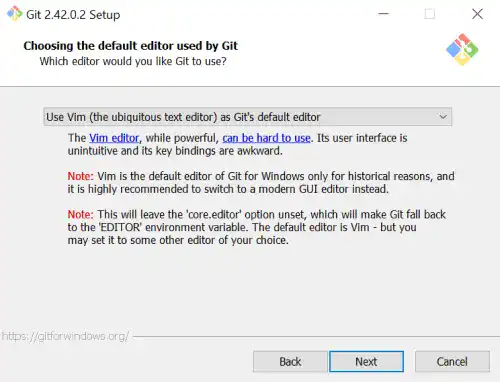
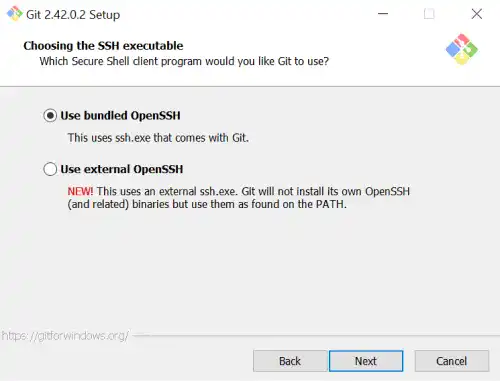
Click on the Next buttons in the following pop-up windows. You can also click on the Next button for the default editor setting without changing the selection. We can change the default editor to Visual Studio Code later.
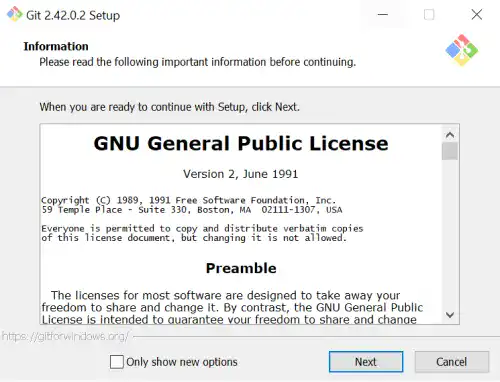
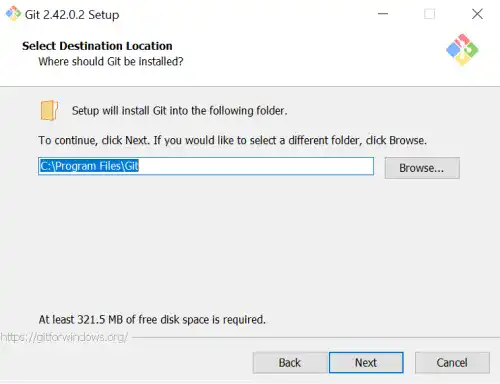
Install Git and Git Bash on Windows: Step 2
Install Git and Git Bash on Windows: Step 3
Install Git and Git Bash on Windows: Step 4
Install Git and Git Bash on Windows: Step 5
Install Git and Git Bash on Windows: Step 6

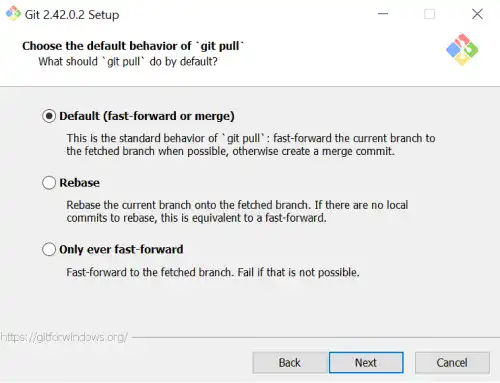
For the initial branch name setting, you can change the default branch name to main; however, for practice purposes and to avoid complexity, select the first option. Continue clicking on the Next buttons in the following pop-up windows.
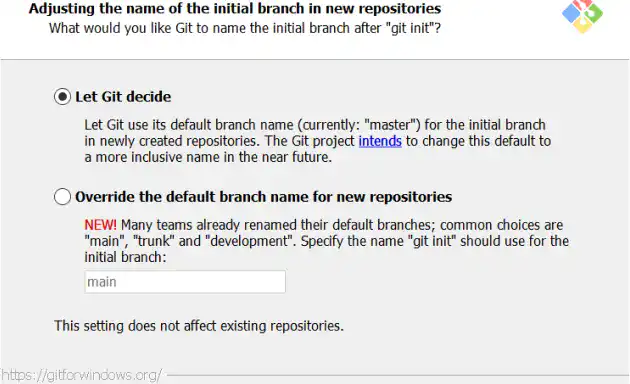
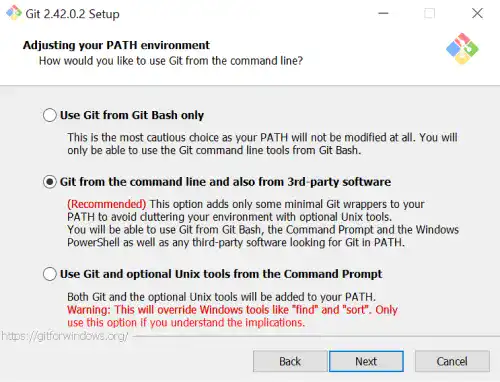
Install Git and Git Bash on Windows: Step 7
Install Git and Git Bash on Windows: Step 8
Install Git and Git Bash on Windows: Step 9
Install Git and Git Bash on Windows: Step 10
Install Git and Git Bash on Windows: Step 11
Install Git and Git Bash on Windows: Step 12
Install Git and Git Bash on Windows: Step 13
Install Git and Git Bash on Windows: Step 14
Install Git and Git Bash on Windows: Step 15

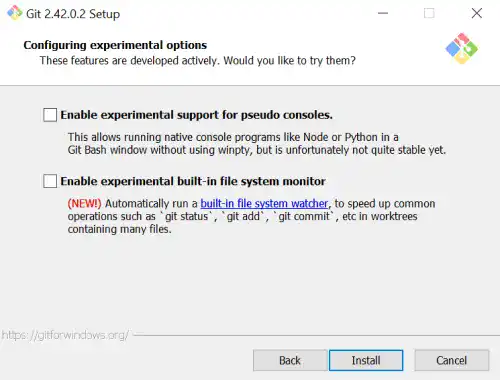
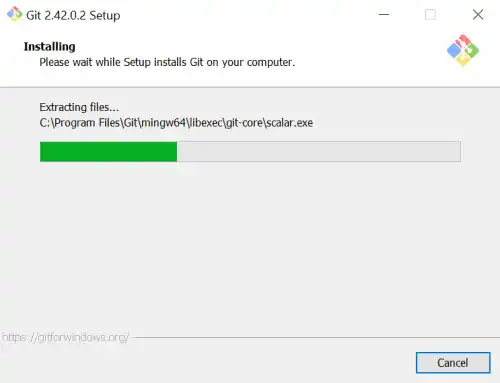
Finally, click on the Install button.

Install Git and Git Bash on Windows: Step 16
Install Git and Git Bash on Windows: Step 17

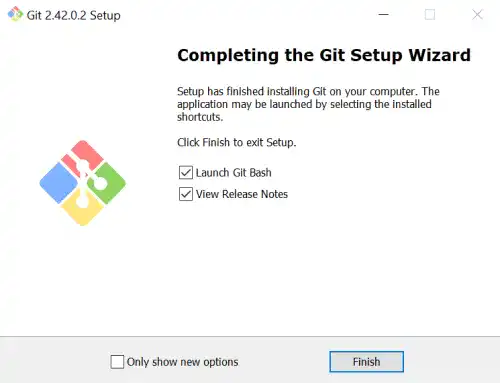
Check Launch Git Bash and click on Finish.

Install Git and Git Bash on Windows: Step 18

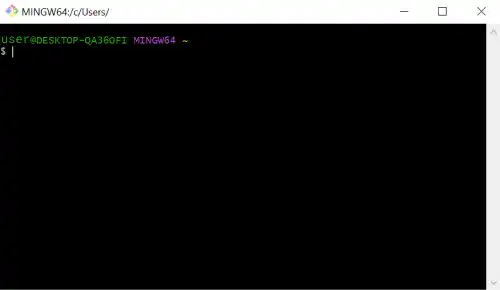
You can check what Git Bash looks like.

Install Git and Git Bash on Windows: Step 19

2. Install VS Code

VS Code is available on VS Code official homepage. Here are the steps to install VS Code on Mac.

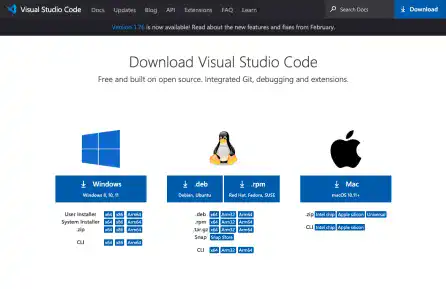
Go to the official site. Select Windows to download VS Code.

Install and set up VS Code on Windows: Step 1

Open the downloaded .exe file and follow the installation instructions.

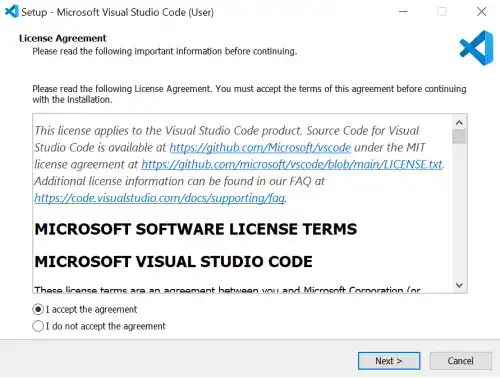
After opening the downloaded .exe file, agree to the software license.

Install and set up VS Code on Windows: Step 2

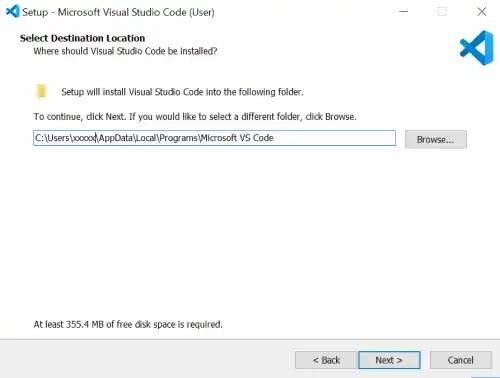
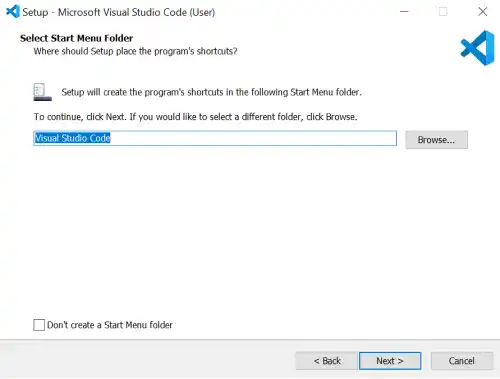
Click on the Next buttons again in the following pop-up windows.
Install and set up VS Code on Windows: Step 3
Install and set up VS Code on Windows: Step 4

For the additional tasks, check all the items so that you can open VS code in various ways.
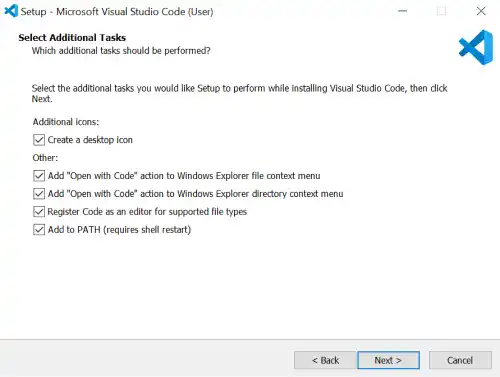
Install and set up VS Code on Windows: Step 5

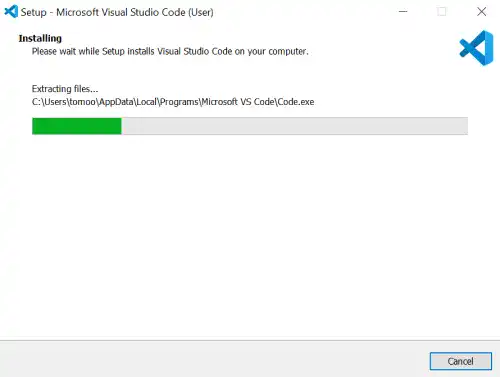
Click on the Install button and complete the installation.
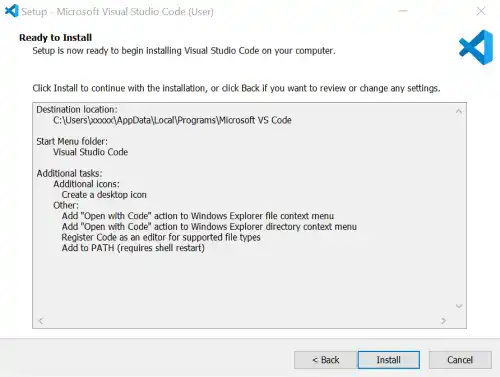
Install and set up VS Code on Windows: Step 6
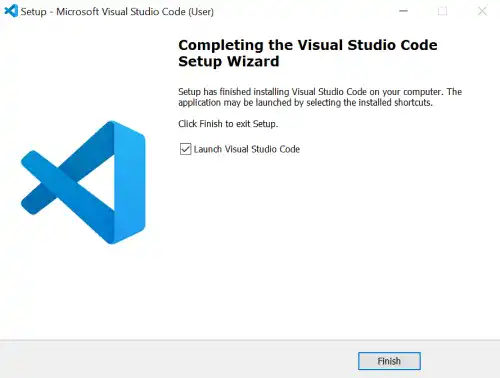
Install and set up VS Code on Windows: Step 7
Install and set up VS Code on Windows: Step 8

3. Set Git Bash as the default command line and open it in VS Code

Set Git Bash as the default command line

As Git Bash is not a default command line for Windows, you need to check the settings.

In the VS code window, click on the settings icon at the bottom left corner and select Settings.
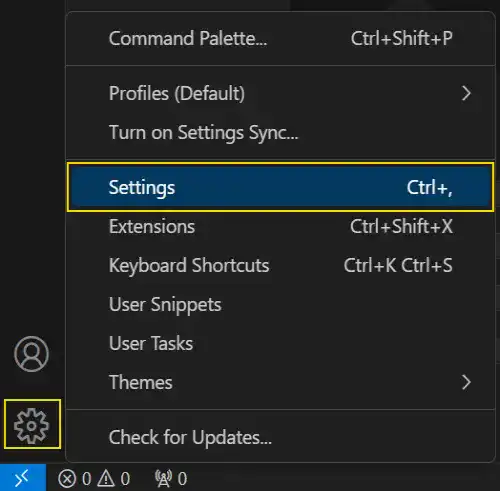
Install and set up VS Code on Windows: Step 9

Type terminal.integrated.default profile: windows. and select Git Bash in the drop-down list.
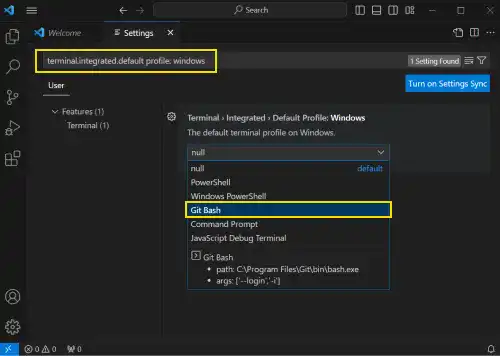
Install and set up VS Code on Windows: Step 10

Open Git Bash in VS Code

To open Git Bash in the VS code window, click on Terminal in the top menu bar and select New Terminal.

Install and set up VS Code on Windows: Step 11

You can see that Git Bash is opened at the bottom of the VS code window.
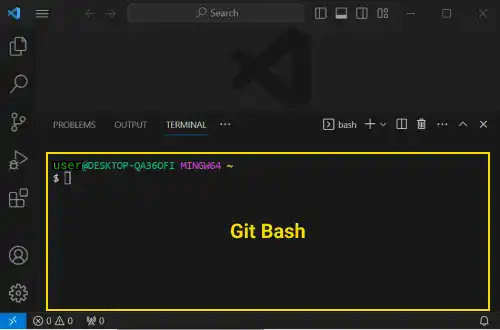
Install and set up VS Code on Windows: Step 12

IdeaWindows Settings

If you are using Windows, it's helpful for you to know how to show extensions as well as hidden files and directories.

To show them, open Windows Explorer and check the following items on the top bar (Ribbon).

  • File name extensions
  • Hidden items

You can also learn this topic offline. Click AmazonKindle.

More Topics to Explore

Managing systemd with systemctl

Systemctl Sub-Commands

Understanding Web Frameworks and Django

Web Framework and Django

Web vs. Application Server Dynamics in Django

Web Server and Application Server in Django

Restoring Files with git restore

Restore Files to Working Tree – git restore

What Is Docker?

What Is Docker?

Tags:

VS Code

Windows

Git & GitHub Introduction
Course Content

Chapter 1. Git & GitHub Overview

What Is Git?

What Is Version Control?

How To Save Versions in Git?

Collaborating on Git & GitHub – Remote Repository

Collaborating on Git & Git Hub – Branch

Git & GitHub Basic Life Cycle

Chapter 2. Git & GitHub Initial Settings

Git & GitHub Initial Settings Overview

Key Tool Preparation (1) – Mac

Key Tool Preparation (2) – Windows

Key Tool Preparation (3) – Linux Remote Server

Git User Settings – git config

Create GitHub Account

GitHub Access Authentication Settings

Generating PAT (Personal Access Token)

GitHub SSH Setup

Chapter 3. Git & GitHub Project Setup

Three Cases in Git & GitHub Project Setup

Git & GitHub Project Setup Overview in Different Cases

Building Remote Collaboration Practice Environment

Project Initiator – Key Steps To Launch Git Project

Project Initiator – Create Local Repository (git init)

Project Initiator – Make the First Commit

Project Initiator – .gitignore File

Project Initiator – Create Remote Repository

Project Initiator – Link Between Remote and Local Repositories (git remote add)

Project Initiator – Upload Local Repository to Remote Repository (git push)

Project Initiator – Grant Remote Repository Access to Project Members

Project Member – Start Project As Collaborator

Project Member – Create Copy of Project Code on Local Computer (git clone)

Non-Member – Start Project With Replica of Existing Repository (Fork)

Fork vs. Clone

Chapter 4. Edit & Commit

Git Regular Workflow – Edit & Commit

Edit and Commit Overview (1)

Add Files to Staging Area – git add

Commit Files – git commit

HEAD and INDEX

Check Status of Working Tree and Staging Area – git status

Check Commit Histories – git log

Check Differences – git diff

Restore Files to Working Tree – git restore

Undo Changes – git reset

Delete Files – git rm

Edit and Commit Overview (2)

Chapter 5. Work With Branches

Git Regular Workflow – Work With Branches

What Is Branch?

Branch Operation Basic Life Cycle

Create Branch and Check Branch Status – Git Branch

Switch Current Branch (1) – Git Checkout

Switch Current Branch (2) – Git Switch

Merge Branches – Git Merge

Fast-Forward Merge

Non-Fast-Forward Merge (No Option)

Non-Fast-Forward Merge (--no-ff Option)

Squash Merge

Rebase Branch – Git Rebase

Managing Conflict

Stash Changes – Git Stash

Chapter 6. Remote Collaboration

Git Regular Workflow – Remote Collaboration

Remote Collaboration Overview

Link With Remote Repository – Git Remote

Upload to Remote Repository – Git Push

Download Remote Repository and Merge to Local Repository – Git Pull

Get Remote Repository Information to Local Repository – Git Fetch

Pull vs. Fetch

Request for Review and Merge – Pull Request

Merge Operation Using GitHub

Chapter 7. Supplemental Topics

Git Key Commands and GitHub Key Features

Git & GitHub Glossary

GitHub Other Features