Creating Your AWS Account

If you’ve ever wanted to launch your own website, build an app, or just explore how the internet works behind the scenes, having an AWS account is a great place to start. AWS (Amazon Web Services) is like a digital toolbox filled with powerful tools—and signing up is your first step toward learning how to use them.
In this section, we’ll show you how to set up your AWS account. Each step is simple and only takes a few minutes. Don’t worry if this is your first time—you don’t need any special background. Just follow along, and we’ll point out what’s happening and why it matters.
Step-by-Step: How to create your AWS account
Let’s get started with setting up your AWS account. You’ll only need an email, a phone number, and a few minutes.
Step 1: Go to the AWS sign-up page
To begin, open a browser and head to aws.amazon.com. Once the page loads, look at the top right corner and click “Create an AWS Account.”

Step 2: Enter your email and set a name
Next, AWS asks for a few details to create your account:
- Email Address – Use an email you have access to. AWS send you your account info.
- AWS Account Name – This is just a label. You can use your name, your project name, or anything you like.
Once filled in, click “Verify email address.”

Note: The account you're creating here will become the root user for your AWS environment. This root user has full access to all AWS services and settings. It’s important to use this account only for critical tasks, like billing or managing users. For everyday use, you’ll want to create a separate user with limited permissions—which we’ll show you how to do in the next section.
Step 3: Check your inbox and verify
Now, go check your email. AWS will send you a verification code.

Copy that code and paste it back into the signup form.
Click “Verify.”
Step 4: Set a password
Here, you’ll create a password for your account. Choose something secure—the longer the better—and write it down or store it in a password manager.
Enter the password twice to confirm, then click “Continue.”

Step 5: Choose personal or professional
Next, you’ll choose your account type:
- Select Personal if you’re an individual.
- Choose Professional if the account will be used for a business or organization.
There’s no difference in features—this just helps AWS understand who’s using their platform.
Step 6: Fill in contact info
Now it’s time to enter your contact details: name, phone number, and address. AWS uses this for billing and notifications. It doesn’t have to match your billing address, but it should be accurate.

When you’re ready, click “Continue.”
Step 7: Add a credit or debit card
Even if you’ve selected the Free Tier (which we’ll cover shortly), AWS still needs a valid credit or debit card to create your account. You won’t be charged unless you go beyond the free limits.
Enter your card details and billing address. AWS may do a quick $1 charge to confirm the card, but it disappears in a few days.
Click “Verify and Continue.”
Step 8: Confirm your identity with your phone
Now AWS will verify your identity. Choose whether you want a text message or a voice call, and enter your phone number.

AWS will send you a 6-digit code. Type it in and click “Continue.”
Step 9: Pick a support plan
You’ll see four support options. For most people just starting out, the Basic Support Plan (free) is perfect. It includes access to documentation and community forums.
Pick Basic Support and click “Complete Sign Up.”

Congrats—your account is created!

Step 10: Sign in to the console
Now that you’ve signed up, it’s time to sign in. Click “Go to the AWS Management Console.”

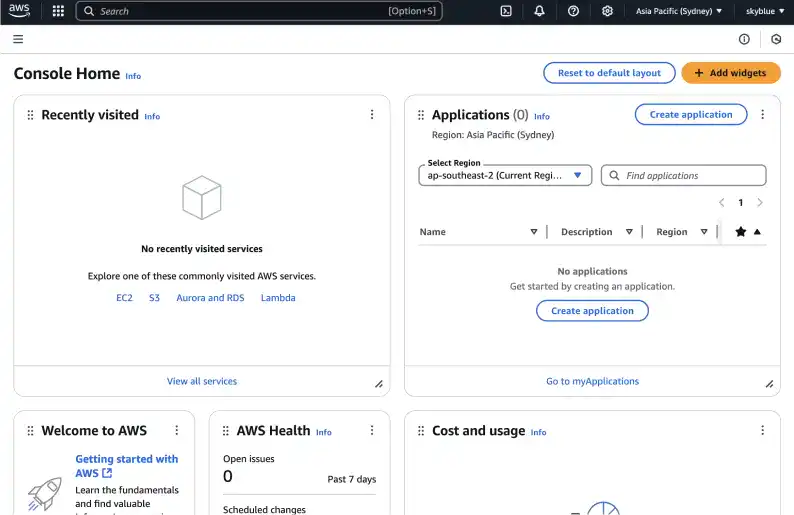
This is your AWS Management Console—the main dashboard where you’ll run services, manage settings, and track everything that happens in your cloud space.
Getting to know the AWS free tier
AWS knows new users want to explore without spending a ton of money. That’s why they offer a Free Tier—a set of services you can use for free for 12 months after creating your account.
Here are some things you can do without paying (as of April 2025):
- Use a small cloud server (EC2) for 750 hours/month
- Store up to 5 GB of files in Amazon S3
- Try out databases like MySQL or PostgreSQL with Amazon RDS
You can build real apps, test your ideas, and learn by doing—all without being billed as long as you stay under these limits.

You can track your usage from the Billing Dashboard in the console.
You're ready to explore
You’ve created your AWS account, set up basic security, and learned how to use the Free Tier safely. You now have access to tools used by startups, universities, and even some of the biggest companies in the world.
In the next section, we’ll show you how to set up user access and permissions with IAM (Identity and Access Management), so you can build your cloud infrastructure safely without giving too much power to any one account.
Take a deep breath—you’ve just taken your first step into the cloud. And it only gets more exciting from here.